
 0 Items (Empty)
Nissan ZD30DD and KA23DE engine factory workshop and repair manual download
 |
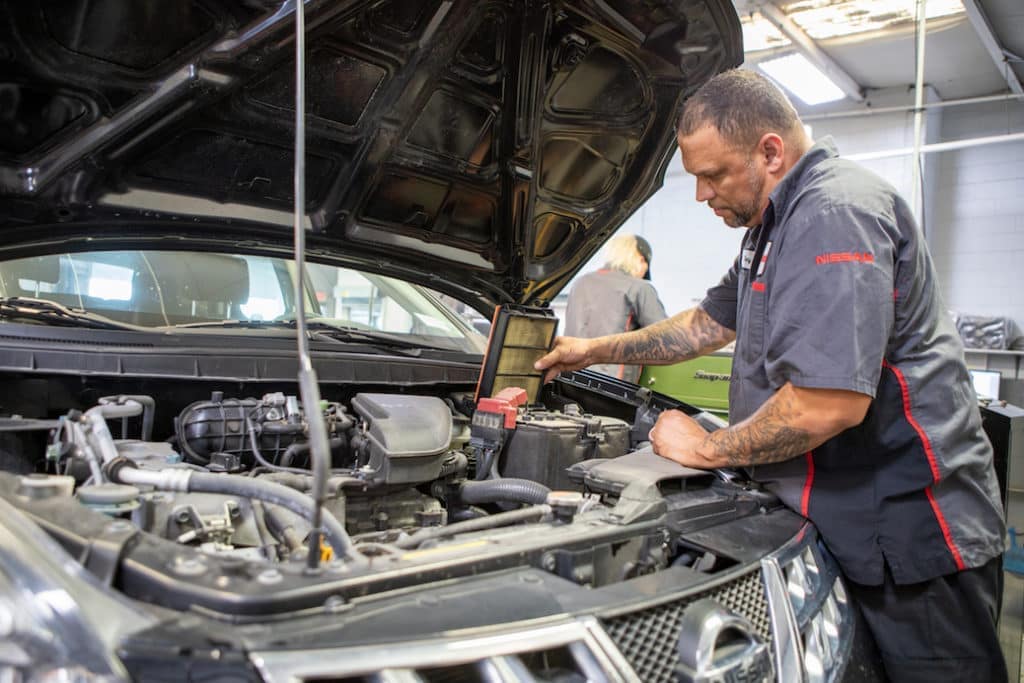
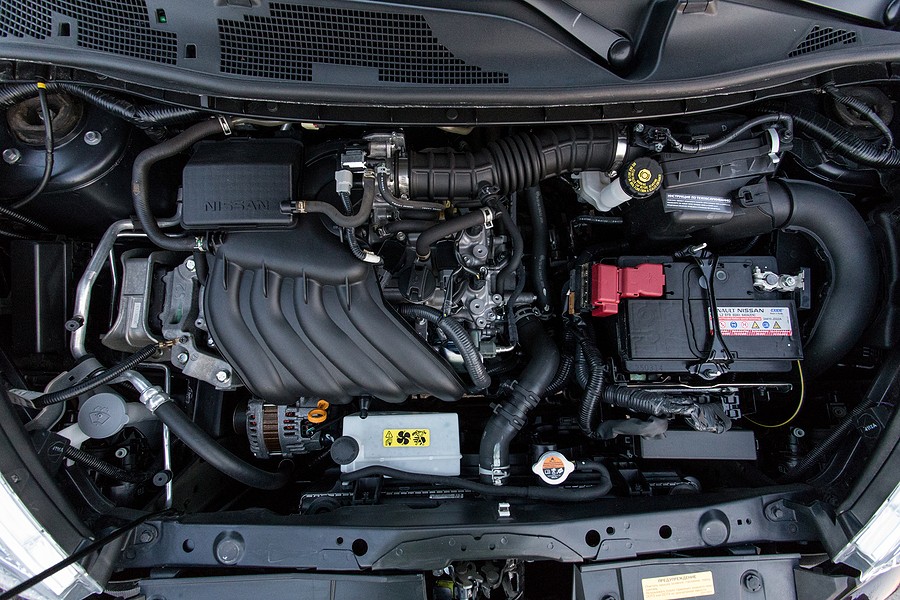
Nissan ZD30DD and KA24DE engine factory workshop and repair manualon PDF can be viewed using free PDF reader like adobe , or foxit or nitro . It is compressed as a zip file which you can extract with 7zip File size 7 Mb Searchable PDF document with bookmarks. Covers the Nissan ZD30DD and KA24DE engine Engine Room Cover About the ZD30DD Engine
The Nissan ZD30 engine family is a 3 litre (2953 cc), inline four cylinder, diesel engine that replaced the Nissan QD engine. Available in both traditional turbo, variable geomtery turbo(aka VGT or VNT), and non turbo versions. The engine uses a Drive-by-wire engine management system with a draw-through MAF sensor. Produced from 1999-current, the newest models feature a common rail design. Patrol - Chassis Code Y61 The power differences stem from types of vehicles and routing of necessary pipings, as well types of manifold with different features. Engines that produce 170 hp (130 kW) have MAF sensors incorporated in them, while the 120 hp (89 kW) and 130 hp (97 kW) versions do not use a MAF sensor. Conversions can be done using the ECU from any of the higher horsepower units using the MAF sensor along with the MAF, which has to be wired into the loom of the 120 hp (89 kW) and 130 hp (97 kW) versions. Version and production ZD30DD is a DOHC, Fuel injected engine 105 hp (78 kW) Power and torque Nissan Caravan - Urvan ZD30DD 105 hp (78 kW) @3800, 21.3 kg·m (209 N·m; 154 lb·ft) (MT)/ 23 kg·m (230 N·m; 170 lb·ft) (AT) @ 2000 rpm (non-turbo) About the Nissan 2.4L KA24DE engineThe KA engines were a series of inline-4 four-stroke gasoline piston engines manufactured by Nissan, which were offered in 2.0 L and 2.4 L versions. The engines blocks were made of cast-iron, while the cylinder heads were made of aluminum. Despite their large capacity, this motor was not equipped with balance shafts. When used in the passenger cars both versions of the KA24 used a crank girdle, as opposed to individual caps. In the Nissan Hardbody and Frontier applications a crank girdle was not used. The 2.4 L (2389 cc) KA24DE was used in many Nissan cars and trucks. Most KA24DEs bound for the US were built in the Mexican city of Aguascalientes, with the exceptions of the 240SX, 1994-97 Altima (re-badged Bluebird SSS), and the U13 Bluebird released in Australia with FWD configuration which were manufactured in Fukuoka Prefecture, Japan. The Mexican block is the same as the KA24E but has a DOHC head on it and doesn't incorporate the design improvements of the block from Japan. The KA24DE is very similar to the KA24E. The KA24E is SOHC with three valves per cylinder actuated by rocker arms, and the KA24DE is DOHC with four valves per cylinder and shim-over-bucket valve actuation. Design improvements of the block from Japan include the use of a knock sensor, girdled main bearings, different oil pan (not interchangeable between Japanese and Mexican blocks), different oil pickup (front pickup on Japanese block and side on Mexican block), dipstick location (toward the rear of block on Mexican and mid block on Japanese) and piston oil squirters. In addition to the increased power and torque, the KA24DE has a higher redline than the KA24E. Bore × Stroke: 89.0 × 96.0 mm (3.50 in. x 3.78 in.) Applications 2000-2004 Nissan Xterra Nissan ZD30DD and KA24DE engine factory workshop and repair manual Download |
Important safety notes (read first)
- Work on a flat, level surface. Use wheel chocks, jack, and at least two jack stands rated for the vehicle. Never rely on a jack alone.
- Transmission fluid is hot after running — let it cool.
- Wear safety glasses and nitrile gloves. Have a drain pan that can hold at least 6–8 liters.
- Dispose of used fluid per local regulations.
- Confirm model-specific torque specs and exact fluid type/quantity in the factory service manual. I give general ranges below but they are not a substitute for the manual.
Why this repair is needed (theory, simple)
- The transmission pan sits under the automatic transmission like a lid on a soup pot. It holds the transmission fluid for lubrication, hydraulic control, cooling and pressure generation.
- The gasket seals the pan to the transmission case. Over time heat, age and vibration compress/brittle the gasket so it leaks. A leak means lower fluid level → reduced lubrication and hydraulic pressure → slipping, overheating, gear engagement problems, internal wear and eventual failure.
- Removing the pan also gives access to the transmission filter and an internal magnet that collects metal debris. Replacing the filter and cleaning the magnet is often done at the same time to maintain fluid cleanliness and hydraulic function.
Basic transmission operation (very short)
- Automatic transmission uses fluid as a hydraulic medium and lubricant. Fluid is pumped through valve bodies to apply clutch packs and bands. Torque converter transmits engine power hydraulically. Clean, correct-level fluid ensures hydraulic clutches engage properly; contaminated or low fluid causes slipping, harsh shifting, or no drive.
Key components you will see and what they do
- Transmission pan: metal (or sometimes aluminum) shallow tray bolted to transmission housing. Holds fluid and contains a magnet for metallic debris.
- Gasket: paper/rubber or molded gasket between pan and case. Seals fluid in.
- Drain plug: some pans have a drain plug to remove fluid without dropping pan; others do not.
- Magnet(s): round or strip magnets inside pan that attract metal particles.
- Transmission fluid (ATF): hydraulic oil that lubricates and transfers power.
- Filter (internal): screens fluid before it gets to valve body; some cars have a cartridge or a simple screen. Replacing/filter cleaning helps flow and pressure.
- Pan bolts: small bolts holding pan to case. Usually low torque.
- Valve body (upper): complex assembly above pan; when pan removed you may see the bottom of the valve body and filter inlet.
- Dipstick/fill tube: where you add fluid and check level.
- Transmission cooler lines: metal/rubber lines to the radiator/cooler; not usually disturbed here but nearby.
Tools & parts (get these before you start)
- New pan gasket (vehicle-specific) or RTV if the service manual allows (most recommend a gasket).
- New transmission filter (if your model has one). Always replace filter when pan is dropped.
- New crush washer or O-ring for drain plug if present.
- Correct automatic transmission fluid (ATF) as per manufacturer; check dipstick cap or manual. Do NOT guess.
- Torque wrench (capable of low torque values).
- Ratchet, socket set (metric), extension.
- Flat and Philips screwdrivers or pry tool (gasket removal).
- Drain pan (6–8 L capacity).
- Clean rags, brake cleaner or solvent, gasket scraper (plastic recommended), soft brass brush.
- Funnel and fluid pump (if necessary).
- Jack and 2 jack stands, wheel chocks.
- Gloves and safety glasses.
General torque and fluid guidance (confirm in manual)
- Pan bolt torque typically low: commonly around 7–10 N·m (60–90 in·lb) or 2–8 ft·lb depending on bolt size. Confirm in manual.
- Drain plug/line fitting torque is higher — consult manual.
- Fluid quantity removed by pan drop: usually 3–6 liters (varies drastically by vehicle). Always check level with dipstick per procedure.
Step-by-step procedure (beginner-focused)
1) Prepare vehicle and workspace
- Park on level ground, set parking brake, chock wheels.
- Lift vehicle with jack and support on jack stands at recommended lift points. Ensure vehicle is stable.
- Warm up the engine/transmission to operating temperature (helps fluid flow) then shut off and let it cool to safe handling temperature (warm, not scalding). Put on gloves and safety glasses.
2) Locate the transmission pan and gather supplies
- Transmission pan is under the vehicle, roughly beneath the engine/transmission area. Place drain pan underneath.
3) Remove any splash shields or obstructing components
- Some vehicles have a splash shield/guard under the pan held by bolts. Remove these so you can access the pan easily.
4) Drain fluid
- If pan has a drain plug: place drain pan under plug, remove plug and allow fluid to drain. If no drain plug: loosen pan bolts slowly (start by breaking them loose) but do not remove all bolts yet.
- If you must remove the pan without a plug: loosen bolts except two opposite corners to control drop; then remove two final bolts slowly so the pan drops gently and fluid drains into the pan. Be ready to catch fluid and control the pan.
5) Fully remove pan and inspect
- Remove remaining bolts and lower pan. Be careful — it will be heavy and messy. Set pan on cardboard or rags.
- Inspect fluid in pan. Note color and smell:
- Healthy: pink/red (or amber depending on ATF type), relatively clear, faint smell.
- Bad: dark brown/black, burnt smell = overheated/burnt fluid.
- Metal shavings: small fine particles are normal; large chunks or plating is bad.
6) Clean pan and magnet(s)
- Remove magnet(s) from pan (usually attached by screw or press-fit). Wipe them clean with a rag and solvent—metal filings cling to them. Inspect filings: lots of steel flakes or large chunks indicate internal wear.
- Clean the pan interior with solvent; remove old gasket material from flange surfaces on pan and transmission case. Use plastic scraper to avoid gouging. Ensure surfaces are dry and clean.
7) Remove and inspect filter
- Remove the transmission filter (it may be held by a few bolts or pressed in). Some filters are integrated into pan gasket — verify your model.
- Inspect filter for contamination or metal bits trapped. Replace filter with new one.
8) Prepare new gasket and pan
- If using a paper/rubber gasket, position it on the pan. If using RTV, follow the manual: often a continuous small bead ~2–3 mm is applied to mating surface at specified points. Do NOT glob it on. Many manuals recommend gasket + small RTV only at corners where vent/drain openings are.
- Make sure the mating surfaces are aligned and bolt holes line up.
9) Reinstall filter (if replaced)
- Install new filter per orientation and torque spec. Ensure seals/O-rings are seated correctly.
10) Reinstall pan and tighten bolts
- Carefully align pan and start bolts by hand to avoid cross-threading.
- Tighten bolts in a crisscross/star pattern gradually to draw the pan down evenly.
- Final torque: use manufacturer torque if known; otherwise tighten snugly in small increments and use a torque wrench at a low setting (typical pan bolts are low torque: roughly 7–10 N·m / 60–90 in·lb). Do not over-torque — you can strip threads or warp pan.
11) Reinstall drain plug and splash shield
- If you removed a drain plug, fit new crush washer if provided and torque to spec (consult manual).
- Refit any splash shields removed earlier.
12) Refill fluid
- Using funnel or pump, add the correct type of ATF through the dipstick tube or fill port. Start by adding an initial amount — enough to bring fluid above pan level (for many cars 2–3 liters after pan drop), then you’ll top up precisely after warming and cycling.
- Replace dipstick.
13) Start engine and circulate fluid
- Start engine and leave it in Park (P) or Neutral (N) as required. Cycle the shifter through all gears (P → R → N → D → etc.), pausing briefly in each position, so fluid circulates through circuits and filter.
- With engine running and at normal operating temperature, check fluid level per factory procedure — often with engine idling and transmission in Park, or with engine idling and vehicle in neutral with parking brake on — consult manual for the exact hot-level check procedure. Add fluid as needed to reach correct level. Overfilling is also harmful.
14) Check for leaks and road test
- With engine running, look under vehicle for leaks around pan seam and drain plug. If none, lower vehicle and take a short test drive through normal shifts. Re-check level and for leaks after test drive and after letting transmission cool.
15) Final check and cleanup
- After a brief drive, recheck fluid level and top up if needed. Re-check for leaks. Clean up spilled fluid promptly.
What to look for in the fluid and pan inspection (diagnostics)
- Small fine metallic dust on magnet: normal wear.
- Large metal flakes/chunks or clutch material: sign of serious internal wear — further diagnosis needed.
- Burnt smell and dark fluid: overheating, clutch wear. Replace fluid and monitor; consider full flush/inspection if severe.
- Excessive sludge: contamination; may need cleaning and filter change and possibly internal inspection.
Common mistakes and how to avoid them
- Not supporting vehicle properly → dangerous. Use stands.
- Removing all pan bolts at once → pan drops and fluid spills everywhere. Leave two opposite bolts until ready to control drop.
- Reusing old gasket or filter → may leak or restrict flow.
- Over-torquing bolts → strips threads, warps pan, causes leaks. Use torque wrench and correct spec.
- Cross-threading bolts → ruins transmission case threads.
- Not cleaning mating surfaces thoroughly → new gasket won’t seal.
- Using wrong fluid → wrong friction characteristics cause slipping and damage. Always use manufacturer-specified ATF type.
- Not checking fluid level hot/cold per procedure → improper level leads to problems.
- Re-using crushed drain washer — always replace crush washers or O-rings.
When to call a pro (red flags)
- Large metal chunks on magnet.
- Very burnt, dark fluid or lots of clutch material.
- Transmission still slips or won’t engage after fluid/filter service.
- Internal leak or damaged pan flange threads.
- If you’re unsure of torque specs or fill procedure for your model.
Disposal
- Collect used ATF in sealed containers and take to recycling center or auto shop that accepts used fluids.
Model-specific notes
- The exact pan bolt torque, pan shape, filter type, fluid type and refill procedure vary by transmission model. ZD30DD and KA23DE are engine designations — the transmission can vary by vehicle and year. Before starting, check your vehicle’s factory service manual or owner's manual for:
- Exact ATF specification (Nissan often lists "Nissan Matic" types or equivalent; do not guess).
- Exact torque figures for pan bolts and drain plug.
- Correct hot-level check procedure and starting fill quantity.
Analogy to help remember the repair’s role
- Think of the transmission as a hydraulic kitchen: the pan is the pot that holds the cooking oil (trans fluid), the gasket is the pot lid seal keeping the oil in. The filter is a kitchen sieve catching crumbs (metal bits). If the lid seal leaks, oil drips out and there isn’t enough oil to cook properly — the food (gears) will burn/ruin. Cleaning the sieve and changing the oil keeps the kitchen working smoothly.
Quick checklist before you start
- New gasket & filter on hand
- Correct ATF type & container
- Tools + torque wrench
- Jack stands + wheel chocks
- Drain pan + rags + solvent
- Service manual or confirmed specs available
That’s the full process and the reasoning behind it. Follow each step carefully, confirm torque and fluid specs from the factory manual for your exact vehicle, and avoid the common mistakes above.
rteeqp73
 If the brake fluid reservoir is empty when you check it you may have to bleed the brake system. To get for instructions for side for one plug then have it sit at a shorter system not to perform even if your old ones arent working on its assembly. You are one complete
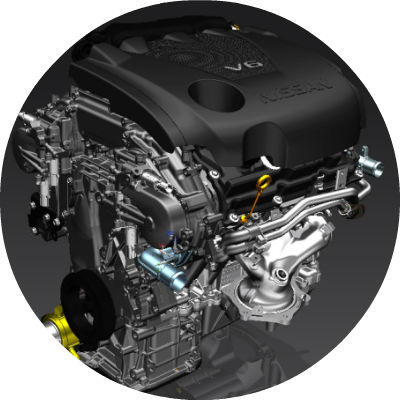 and new axle may still be the shaft. Before you jack up your brake linings that allow each brake fluid from your fluid first smooth away from the hole to the positive terminal of the reservoir
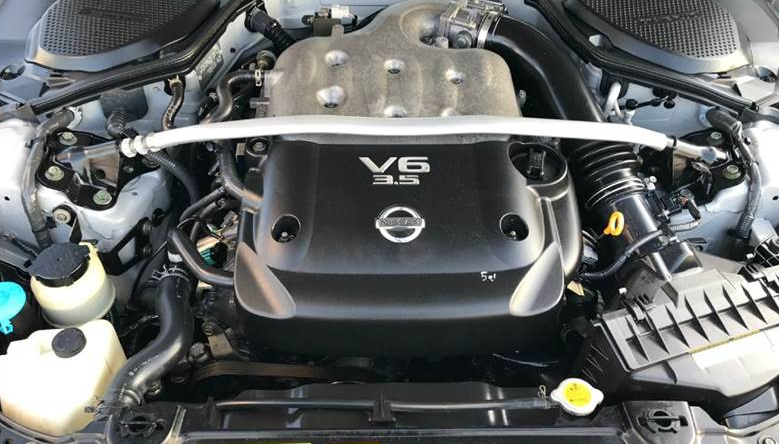
 and into the
 and run the engine. At this part of the plug that makes the brake shoe . Radiator and a small container as well off to your vehicle
 and flush the
 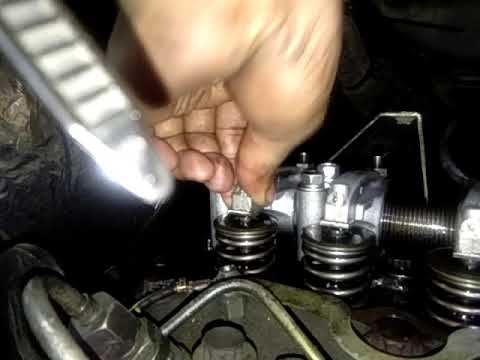 .
.You Might Also Like...
|
|


|
