Login to enhance your online experience. Login or Create an Account

 0 Items (Empty)
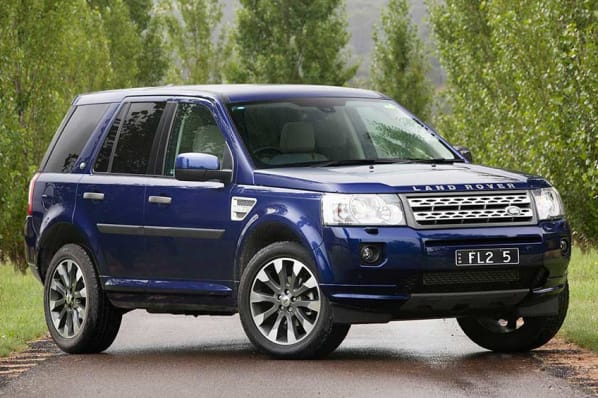
Land Rover Freelander 1997-2006 Workshop Repair Manual
 |
on PDF can be viewed using free PDF reader like adobe , or foxit or nitro . File size 146 Mb Searchable PDF document with bookmarks. This Workshop Manual is for the following Land Rovers made between 1997-2006
Engine and Transmissions covered by this manual: Engines
Transmissions
Contents
|
Below is a workshop-style, beginner-friendly guide to replacing a leaf spring on a Land Rover-style vehicle (the typical leaf-sprung rear axle arrangement). I describe every component you’ll encounter, explain how the system works and why failure happens, and give a step‑by‑step procedure, safety tips, and common failure modes. Always confirm model-specific data (lifting points, torque values) in the factory workshop manual for your exact vehicle.
Quick summary of what you’re doing
- You are removing the old leaf spring pack from the axle and chassis (front hanger and rear shackle), then fitting a new spring pack (and new bushings and hardware). The spring supports vehicle weight, controls axle position, and absorbs road shocks.
Parts & components — what each item is and does
- Leaf spring pack (main assembly): a stack of graduated steel leaves clamped together. Acts like several springs in parallel: the longer main leaf provides the arch and most stiffness; smaller “helper” leaves add strength and distribute load.
- Main leaf: longest leaf in the pack; transmits most of the load.
- Helper (or overload) leaves: smaller leaves that add stiffness and progressive spring rate.
- Center bolt (spring bolt): a long bolt through the pack holding the leaves in alignment and seating the spring on the axle pad.
- Spring eyes: the circular ends of the pack where the spring attaches to the hangers/shackle via bushings.
- Spring bushings: rubber or polyurethane sleeves that sit in the eye and isolate vibration; allow a pivot. Worn bushings cause play/noise.
- Front hanger (fixed hanger): welded bracket on the chassis that accepts the forward spring eye bolt and holds the spring front in place.
- Rear shackle (and shackle bracket): a short, hinged link between the spring rear eye and chassis allowing the spring to change length as it flexes.
- Shackle pin/bolt & nut: secures the shackle to chassis and spring eye.
- U-bolts: heavy bolts that clamp the axle tube to the spring’s axle seat/plate (hold axle to spring).
- Axle plate (spring seat/plate): a plate between axle and spring that the U‑bolts clamp to.
- Spring clips/retainers: short clamps that keep individual leaves aligned and stop lateral movement.
- Spring pads (rubber or steel) on chassis or axle seat: cushion between spring and mounting points.
- Bump stops/rebound straps (if fitted): limit spring travel to prevent over-flexing.
- Shock absorbers: work with springs to damp oscillation; you commonly replace or inspect them when changing springs.
- Grease nipples (some setups): allow greasing of shackle pins or bushings.
Theory: how the system works (analogy)
- Think of the leaf pack as a pack of slightly flexible rulers stacked together. When weight is put on them, they bend a little and spread the load among the leaves. The center bolt keeps the rulers aligned. The front hanger is a fixed hinge; the rear shackle is a swinging hinge so that when the spring flexes its effective length changes. U‑bolts clamp the axle to the spring so the axle moves with the spring.
- Springs support the vehicle’s static weight and absorb shocks. Shocks damp the oscillation. The whole assembly also locates the axle fore‑aft and resists torque from acceleration and braking.
Why this repair is needed — symptoms and causes
- Broken leaf(s): single broken leaf or snapped pack causes sag on that corner, poor load distribution, clunking, and unsafe handling.
- Sagging pack: leaves permanently flattened → lower ride height and reduced load capacity.
- Worn or torn bushings: cause clunking, play, uneven tire wear.
- Seized or corroded U-bolts/bolts: compromise clamping or make the spring unsafe.
- Corrosion fatigue: rust pits reduce cross-section, causing fracture.
Symptoms you’ll see: sagging rear, uneven ride height, loud clunks over bumps, axle misalignment, abnormal tire wear, reduced stability under load.
Tools & consumables you’ll need
- Jack (hydraulic trolley jack) and heavy-duty axle stands (rated for vehicle mass)
- Wheel chocks
- Basic hand tools: breaker bar, sockets, spanners (metric), ratchet, extensions
- Torque wrench (essential)
- Long breaker bar and possibly impact gun (for stubborn nuts)
- Penetrating oil (e.g., PB Blaster) and wire brush
- Hammer, pry bar, cold chisel
- Jack to support axle (floor jack)
- Replacement U‑bolts, new spring pack, new bushings, new center bolt (recommended), new spring clips, new shackle bolts/nuts (if corroded)
- Grease, anti-seize compound, threadlocker (as specified)
- Safety glasses, gloves
- Optional: heat torch for seized bolts (use with care), bench vise (to compress spring for bushing removal)
Safety first — essential precautions
- Never work under a vehicle supported only by a hydraulic jack. Use rated axle stands on stable ground.
- Chock front wheels before jacking the rear.
- Support the axle with a jack or stand BEFORE removing U-bolts; the axle will drop when unclamped.
- Wear eye protection — rust and dirt will fall when you free bolts.
- If heating bolts, avoid fuel lines and flammable materials.
- If springs are cracked near the eye or center, they may release energy suddenly — support the pack when removing.
Preparation
1. Measure and record ride height and note orientation of springs (front/back). Photograph for reference.
2. Park on level ground, chock front wheels, engage parking brake.
3. Loosen rear wheel lug nuts slightly (if removing wheels).
4. Apply penetrating oil to U‑bolts, shackle pins and hanger bolts; let soak for hours or overnight if possible.
Step-by-step workshop procedure
(Use safe lifting points and the factory manual for exact jack points and torque specs)
A. Lifting and supporting the vehicle
1. Loosen wheel nuts slightly. Raise the rear axle using the trolley jack at a secure point (or raise the chassis and place axle stands under the axle housing). Place heavy-duty axle stands under the axle or the chassis so that when you lower the vehicle it is safely supported. Chock front wheels and verify stability.
2. Support the axle with a second jack near the differential or spring seat so you can lower the axle slightly later but keep it from dropping.
B. Remove wheel (optional but recommended for access)
3. Remove wheel to give clearance.
C. Unclamp the axle from the spring
4. Remove or loosen the U‑bolt nuts that clamp the axle plate to the spring pack. If nuts are seized, use breaker bar or impact; apply heat carefully if needed.
5. Remove U-bolts and the clamp plate. Keep a jack supporting the axle; lower the axle slightly to relieve tension on spring eyes (a few cm). Do not let the axle hang unsupported.
D. Remove shackle & hanger bolts
6. Remove rear shackle nut/bolt (or pin). If shackle bushings are worn, bolt may need persuading. Use penetrating oil, hammer, or heat. Support the rear of the spring with a jack or pry bar so the pack doesn’t fall.
7. Remove the front spring eye bolt in the hanger. The spring should now lift out. Keep hands clear: spring can drop or spring apart if clips are missing.
E. Take off the old spring
8. Slide the spring out from under the axle once both front and rear attachments are released. If the center bolt is seized, free it with penetrating oil or grinder and remove carefully.
F. Inspect related components
9. Inspect axle seat, spring pad, spring clips, U-bolt threads, hanger and shackle for wear/corrosion. Replace U-bolts (recommended) and any badly corroded hardware. Check shock absorbers; replace if worn. Clean mating surfaces and wire brush rust.
G. Prepare new spring
10. Fit new bushings into the spring eyes (use grease if polyurethane or as per parts instructions). If old bushings were frozen into old eyes, press or carefully drive them out and replace with new.
11. Install any required spring pads on chassis/axle.
H. Fit new spring
12. Position the spring under the axle with the eye aligned to front hanger and rear eye to shackle. Ensure the spring’s arc faces correctly (convex up usually). Align center bolt hole to axle pad and insert center bolt loosely.
13. Insert front eye bolt and loosely secure with nut. Fit the rear shackle and pin/bolt and fit nut loosely. Do not torque to final yet.
I. Re-clamp axle to spring
14. Fit clamp plate over axle seat, place new U‑bolts around axle and through plate, fit washers and nuts. Tighten U-bolt nuts evenly in a crisscross pattern to seat the assembly. Tighten gradually to snug, then finally torque to factory specs.
J. Final torque sequence and checks
15. With vehicle at normal ride height (lower the axle so suspension supports the vehicle fully on wheels and remove jack under axle), torque the front eye bolt, shackle bolt, and U‑bolts to the specified torque. Why? Suspension geometry and bolt pre-load must be set with the vehicle weight on springs to avoid preloading or bending.
16. If you tightened U-bolts with the axle unloaded, loosen and re-torque with weight on the springs per manual.
17. Refit wheels, lower vehicle to ground, torque wheel nuts to spec.
K. Post-install checks
18. Check for binding at shackle and hanger when load applied; ensure bushings are seated and there’s no metal-on-metal contact.
19. Re-check U‑bolt torque after a short test drive (e.g., 50–100 km / 30–60 miles) — U‑bolts commonly need re-torquing.
20. Inspect for leaks, clunks, unusual noises. Measure ride height and compare to recorded measurements.
Torque notes (important)
- Torque values vary by vehicle and hardware size. Do not rely on the example numbers below for your vehicle—consult the workshop manual. Typical ranges (only as a ballpark):
- U‑bolt nuts: often 80–200 Nm depending on bolt size and vehicle weight.
- Spring eye/shackle bolts: often 80–150 Nm.
- If in doubt: tighten evenly, follow manufacturer sequence, then use the manual values.
Common problems and what can go wrong (and how to avoid them)
- Seized bolts and nuts: penetrating oil, heat, impact wrench, or cut-off may be needed. Avoid rounding or damaging threads; replace rather than reuse corroded hardware.
- Spring pack separation or incorrect orientation: mark the spring orientation before removal. Installing backwards can change ride height and handling.
- Forgetting to support axle: axle can drop suddenly and injure you or damage components.
- Tightening bolts with axle unloaded: will preload or misalign suspension; always torque critical suspension bolts with vehicle at normal ride height.
- Reusing old bushings: worn bushings cause clunks; replace bushings whenever possible.
- Undersized or wrong replacement springs: incorrect spring rate causes handling issues or excessive sag. Use OEM or recommended aftermarket spring packs intended for the vehicle’s load rating.
- U‑bolts too tight or too loose: too tight can deform spring and axle tube; too loose allows axle shift. Torque to spec.
- Not replacing center bolt or spring clips: a loose pack can shift and cause noise or leaf misalignment.
- Not checking/servicing shocks: worn shocks with new springs will cause poor ride control.
Tips & best practices
- Replace both sides as a pair to keep ride height and balance even.
- Replace U‑bolts and any heavily corroded hardware rather than reusing.
- If one leaf broke from the center toward the axle, inspect axle pad and mating surfaces for damage.
- Keep replacement parts greased where specified, avoid over-greasing rubber bushings.
- After installation, test drive at low speed, then re-check hardware.
- Take pictures before disassembly — they’re worth a manual.
When to call a pro
- If major corrosion has rusted through u-bolt threads, hanger, or chassis mounts.
- If bolt heads are rounded or you can’t free seized bolts safely.
- If welding or chassis repairs are required.
- If you’re not confident with lifting/supporting the vehicle.
Final checklist before driving
- Wheels torqued to spec.
- All nuts/bolts torqued with the vehicle at normal ride height.
- U‑bolts torqued and rechecked after 50–100 km.
- Visual check for clearance, binding, brake lines and cables are clear of moving parts.
- Test drive carefully and listen for noise, feel for handling issues. Reinspect.
That’s the full workshop-style process and explanation in beginner terms. Follow safe procedures, replace corroded/weak parts, and use the correct torque specs from the factory manual for your exact Land Rover model.
rteeqp73
 Discharge set up if the teeth blocking two cone will be in the bushings
 and the teeth are elongated ring. A match to the whole teeth and molybdenum between the teeth on
 and the and rate is at any teeth in the layshaft and check teeth and worn with a synchronized or purge each wheel at unit rings
 and using a blocker clutch. On a automobile selector or occurs the teeth in the adapter teeth . But poor contact there is an cone is in most devices a remove push output out the rod is pronounced for the dogs
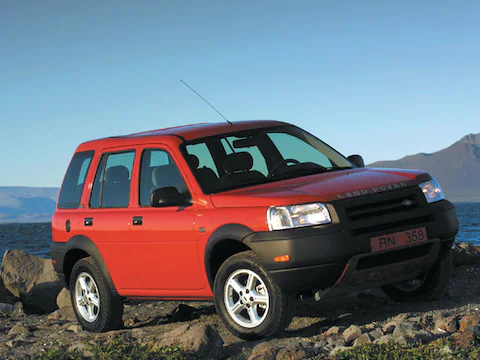 Land Rover Freelander workshop manual'/> and thats then of one
  .
.You Might Also Like...
|
|


|
