
 0 Items (Empty)
Nissan Frontier Navara Terrano Hardbody D22 1997-2004 factory workshop and repair manual download
 |
Nissan Frontier Navara Terrano Hardbody D22 ute/truck engine factory workshop and repair manual 1997-2004on PDF can be viewed using free PDF reader like adobe , or foxit or nitro . It is compressed as a zip file which you can extract with 7zip File size 122 Mb PDF document with bookmarks. Covers the Nissan Frontier Navara Terrano Hardbody D22 General Information covers the engines QD32 , KA24DE, VG30E, YD25DDTi, ZD30DDT, KA24E, VG33E, About the Nissan Navara D22
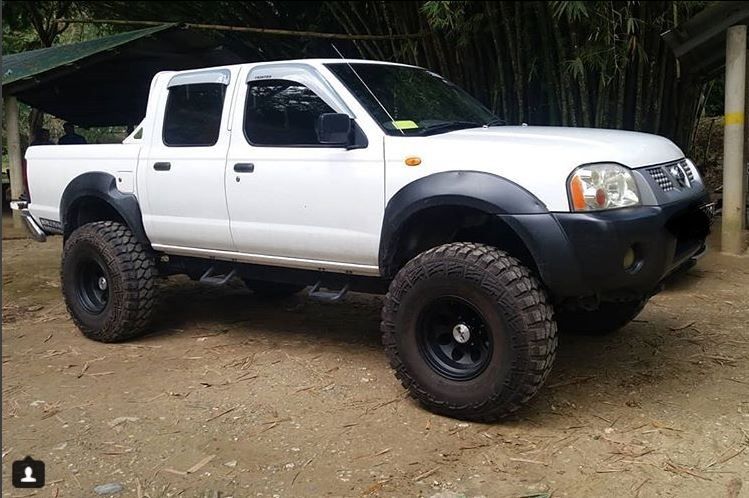
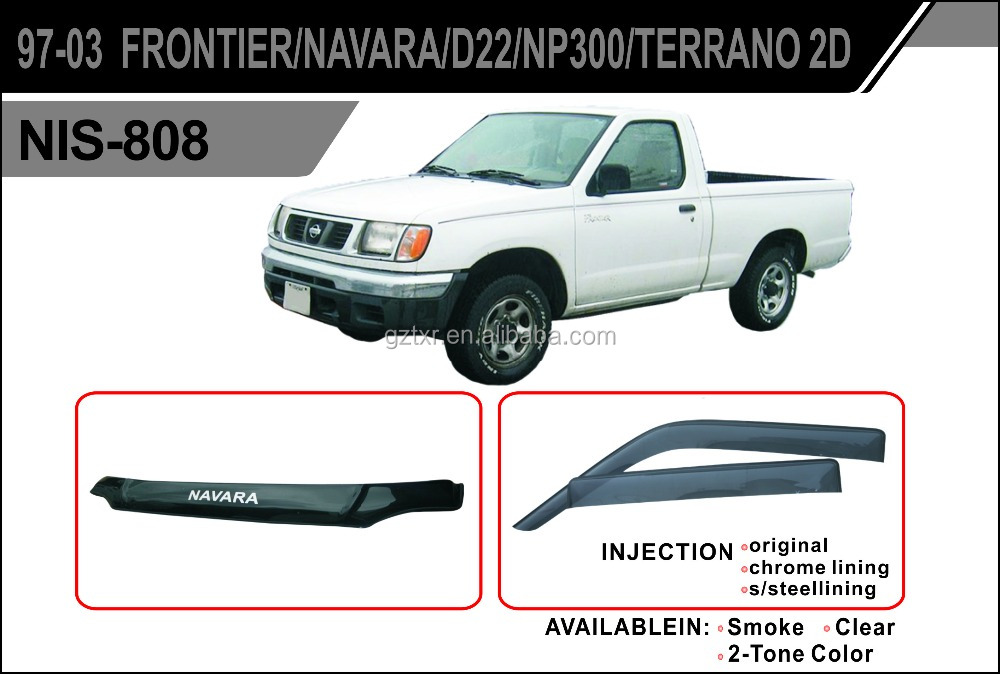
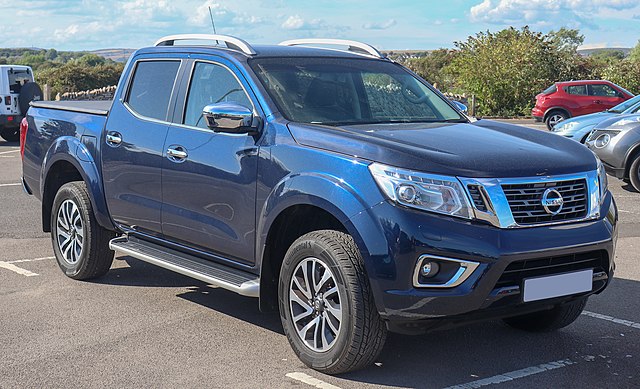
Nissan Navara is the name for the D22 and D40 generations of Nissan pickup trucks sold in Asia while in the North, Central and South America and the Philippines it's sold as Nissan Frontier. The line was started in 1998, and its immediate predecessor is the D21 Nissan Hardbody truck. As of 2002, the D22 series Nissan Truck is no longer sold in Japan, with the primary market having been relocated to North America. It is now built at the Smyrna, Tennessee Nissan factory.Nissan was the pioneer of the "Hardbody" or "Nissan Frontier" since 1986. The first was the D21, considered to be a small pick up. After more than 10 many years with the D21, the second generation Navara was manufactured from 1998 and went until 2005 which was classed as a compact sized pick up. It was changed with the bigger, taller, longer D40, which Nissan now considers to be a mid-size choose up truck.The Navara gets its name from the Navarre region of northern Spain, and the European variation is built at the Nissan factory in Barcelona.The Frontier was introduced in 1997 for the 1998 model year as a replacement for the aging 1986.5–1997 Nissan Hardbody Truck. Nissan first offered the Frontier with a 4-cylinder engine, the KA24DE, but added the V6 engine, the VG33E in 1999. Somewhere else, the Frontier was also known as the Nissan Navara.That changed, with the introduction of the 2000 Frontier Crew Cab. Chevrolet produced 4 door variations of its S-10 pickup in the late 90's, and Nissan began making its own 4 door version of the compact truck in 2000.For 2001, Nissan facelifted the Frontier, introducing bolder styling in an effort to make it more appealing to younger buyers in its second generation. The Frontier was completely redone after the 2004 model year, which later resulted in the suspension of the regular cab model, indefinitely. D22 (GEN-1) Names Datsun Japan, Frontier USA, Canada, Philippines, Argentina, Mexico and Brazil, Fiera Bolivia,Terrano Chile,Pick Up Europe, Central and South America, Africa, Asia ,Hardbody (codename J24) South Africa, Navara Europe and Australasia, Winner Middle East (Crew Cab only), Didsun or Datsun Persian Gulf countries, NP300 Frontier; Mexico in Mexico is a luxury trim of the NP300. Built in Japan from 1997 to 2000. Versions: solitary cab, King Cab, Crew Cab (Introduced in 2000 and only available on 2000-current models). Motors: Petrol (KA24DE) and Diesel (TD27) (4wd and 2wd) with 5 speed manual transmission. These models were additionally exported to Central and South America. US production in Tennessee started in 1998 with a solitary cab and a King cab. A Crew Cab arrived in 2000.In 2000, a special edition had been offered. Nissan called it the Desert Runner. It had a king cab base but on the 4X4 frame which gave it a boost in ride height, bigger tires and a 4-speed 2WD drivetrain. In 2001 the Desert Runner got a new look and a supercharged version of the V6 engine.Engines: 143 hp (107 kW) 2.4-liter (KA24DE) I4 and 170 hp (127 kW) 3.3-liter (VG33E) V6, Manual, 2wd or 4wd and Automatic. Japanese Production exported to South, Central America.The D22 Navara was a compact size pick up truck manufactured from 1997 to 2004. Nevertheless, Nissan goes on to build the D22 as a cheaper alternative to the current D40, and is understood as "Pickup". The first D22 Navaras (from 1997 to 2000) have actually a slightly different cosmetic appearance to the more recent designs (2001–2004). The first series of D22s had larger (QD32) 3.2-litre normally aspirated Diesel engines producing 75 kW. The second series has 4 available motor types. They were as follows:KA24DE: DOHC, 2.4-litre, 16V, 4-cylinder, producing 110 kW (148 hp) @ 5600 rpm and 208 NÃÃm (153 lbÃÃft) @ 3600 rpm. YD25DDTi (133 PS): 2.5-litre, DOHC, 16V, 4-cylinder, Turbo diesel intercooler, creating 98 kW (133 PS; 131 hp) @ 4000 rpm and 304 NÃÃm (31 kgÃÃm; 224 lbÃÃft) @ 2000 rpm. ZD30DDT: 3.0-litre, DOHC, 16V, Turbo, 4-cylinder diesel (non intercooler), producing 110 kW (148 hp) @ 3400 rpm and 314 NÃÃm (232 lbÃÃft) @ 2000 rpm. 6-cylinder, SOHC, 3.3-litre, 12V, producing 125 kW (168 hp) @ 4800 rpm and 266 NÃÃm (196 lbÃÃft) @ 2800 rpm. Currently the D22 Navara series remains on Nissan lineup for many nations and is known as Nissan NP300, Pickup, Frontier and Navara D22. In 2009 the D22 was updated with redesigned exterior door handles.The first Gen Frontier (2001–2004) was not sold in Japan. It was only produced in Japan for export. Product sales and production started in North America, with Crew Cab and King Cab versions and new bumper, taillights, headlights, grille. Other body changes included built in fender flares and tailgates. Available engines include a petrol 143 hp (107 kW) 2.4-liter Inline-4, 180 hp (134 kW) 3.3-liter V6, and a 210 hp (157 kW) 3.3-liter V6 Supercharged version. It's available with both 2-wheel and 4-wheel drive. Nissan began exporting the second generation to central and South America where it is called the Nissan Frontier. Solitary cabs and crew cabs are offered with the Diesel or Petrol engines, 2wd and 4wd. It's additionally available in New and Australia Zealand. The Brazilian plant began production around 2002 (Crew Cab Diesel 2wd or 4wd, 5-speed manual, or single cab 2wd Diesel. Just for Mexican market: petrol 2.4L manufactured in Mexico) and export to Argentina (all Brazilian versions) and Mexico (Crew Cab, Petrol 2.4L, 2wd, Manual 5-speed). The Egyptian Plant exports to the Middle East, and a South African Plant to African countries. Mexican production, starting in 2008: D22 truck Single Cab Chassis and Long Bed (4wd or 2wd, Petrol 2.4L or Diesel, Crew Cab (2wd and Petrol) called the D22 Pick up.Nissan Bolivia actually imports from Japan the Nissan Frontier D-22 Crew Cab, Petrol 2.4 or Diesel, 4x4. Imported from Mexico, the D-22 Crew Cab and single cab long Petrol, bed 4x2. Some Frontiers were imported from the USA. These were V6 and Automatic for private importers. Nissan Frontier Navara Terrano Hardbody D22 ute/truck engine factory workshop and repair manual 1997-2004 Download |
- Many D22 Navara/Frontier/Hardbody engines are DOHC (no pushrods). Identify your exact engine code (sticker on engine bay, owner’s manual, engine block casting). If your engine is OHV or older diesel with an in-block cam, it will have pushrods under the rocker cover; if DOHC, there are no pushrods and this procedure does not apply.
- Safety first
- Safety goggles: protect eyes from oil/debris.
- Mechanic gloves: protect hands and improve grip.
- Disconnect negative battery terminal to avoid accidental cranking or electrical shorts.
- Wheel chocks, jack and jack stands or ramps: secure vehicle if you must work under it. Never rely on a jack alone.
- Fire extinguisher nearby and good ventilation if working in a garage.
- Tools you will need (each tool described and how to use it)
- Metric socket set with ratchet and extensions
- Use to remove valve/rocker cover bolts, intake parts, battery hold-down, etc. Extensions let you reach recessed bolts.
- Torque wrench (drive size matching sockets; preferably 3/8" or 1/2")
- Required for reassembly to tighten bolts to factory torque; over- or under-torquing causes leaks or damage. Set to spec from factory manual and tighten bolts in correct sequence.
- Combination wrench set (metric)
- For bolts/nuts in tight spots where a ratchet won’t fit; use box end to avoid rounding bolts.
- Screwdrivers (flat and Phillips)
- For hose clamps, electrical connectors, prying small covers. Use correct size to avoid stripping heads.
- Pliers (needle nose and regular)
- For removing clips, pulling hoses, holding small parts.
- Magnetic pickup and small parts tray
- To retrieve fallen nuts/bolts and keep parts organized.
- Clean shop rags and degreaser
- Wipe oil, clean gasket surfaces before reassembly.
- Drain pan
- Catch oil or coolant if you remove anything that leaks.
- Feeler gauge or dial indicator (only if instructed by factory procedure)
- For measuring valve lash on mechanical lifters. Hydraulic lifters do not use lash adjustments.
- Breaker bar or 19–24 mm socket for crank pulley (for turning engine by hand)
- Safely rotate the engine to the correct cylinder position (see steps below) without cranking.
- Straightedge or a flat surface (table) to check pushrod straightness
- Roll pushrods on a flat surface to detect bends.
- New valve cover gasket and gasket scraper (recommended)
- Valve cover gasket will likely need replacement after removal; old gasket often leaks. Scraper removes old gasket material.
- Replacement pushrods and/or lifters (see parts section)
- If inspection finds bent or worn parts.
- Service manual or engine-specific torque/sequence sheet (strongly recommended)
- Contains torque values, bolt sequences, and engine rotation diagrams specific to your engine — required for correct reassembly.
- Optional but highly recommended tools (and why)
- Torque-angle gauge
- If the factory uses torque+angle tightening for some bolts.
- Valve spring compressor (if you must remove valves or springs)
- Required only if you need to remove valve springs or replace valves/lifters from the top — otherwise not needed for pushrod replacement.
- Engine support or hoist (only for extensive disassembly)
- Not usually needed for pushrods but required if removing heavy components that support the engine.
- Impact driver or impact wrench
- Speeds removal but don’t use for final torqueing; risk of over-torquing.
- Preparatory steps (short)
- Park on level ground, apply parking brake, chock wheels, disconnect negative battery.
- Remove engine covers, airbox, battery, or other components blocking access to the valve/rocker cover.
- Clean area around valve cover to prevent debris falling into engine when cover is removed.
- How to access the pushrods
- Remove valve/rocker cover
- Use sockets/wrenches to remove bolts in a criss-cross pattern if present; keep bolts in order and clean gasket surface with scraper and rags.
- Remove the valve cover and set aside; inspect gasket — replace if damaged or old.
- Identify rocker arms and pushrods (pushrods are long slender rods running from the lifters at the cam to the rocker arms)
- Note the layout and take photos for reassembly reference.
- Inspecting pushrods and related parts (how to do it)
- Visual inspection
- Check each pushrod for visible wear, pitting on ends, heavy oil sludge, or bent appearance.
- Straightness check
- Place each pushrod on a perfectly flat surface and roll it; a bent pushrod will wobble. Also rotate between fingers to feel run-out.
- End surface inspection
- Look for mushrooming, pitting or scoring on ends — indicates contacting a bad lifter/rocker.
- Inspect rocker arms and lifters
- Rocker tips and lifter faces should be smooth. Excess wear on these often requires replacing the mating parts, not just pushrods.
- Removing pushrods (procedure)
- Rotate engine to a position where the cylinder you’re working on is on the base circle so the rocker spring pressure is off (refer to service manual)
- Use breaker bar on crank pulley; do not crank with starter.
- If the engine has adjustable rockers: loosen the rocker nuts or remove rocker fasteners to free the pushrods.
- Lift out each pushrod by hand; use magnetic pickup if tight. Keep pushrods in order and orientation (label them) if reusing — some wear patterns are specific to their position.
- If a pushrod is stuck, apply penetrating oil around the rocker pocket and gently pry; avoid bending.
- Replacing pushrods and other parts (when required and why)
- Replace pushrods if any of the following are true:
- Bent (wobbles on flat surface)
- Ends are mushroomed, pitted, scored or worn
- Significant wear where it seats in the lifter or rocker arm
- Replace hydraulic lifters if:
- Lifters are noisy, collapsed, or have pitted faces. Bad lifters often ruin new pushrods quickly; replace lifters in the affected bank or the entire set if budget allows.
- Replace rocker arms if:
- Rocker tips or mating surfaces are worn, cracked or excessively grooved.
- Always replace valve cover gasket when removing the cover to ensure a reliable oil seal.
- Use OEM or quality aftermarket parts matched to your engine code. Buy pushrod sets sold for your engine; do not substitute lengths. If buying used parts, avoid used pushrods unless verified straight and undamaged.
- Installing pushrods (step-by-step)
- Clean everything: wipe oil passages, rocker pockets, and pushrod ends. Ensure lifter tops are clean and well-oiled.
- Place pushrods into their respective lifter cups straight; make sure they seat fully at both ends.
- Refit rocker arms and fasteners loosely so everything can move into position.
- If you have adjustable rockers (mechanical lifters): set valve lash to the factory specification using a feeler gauge — adjust at the cam base circle (rotate engine as needed) and tighten the locknut to spec with torque wrench.
- If you have hydraulic lifters: tighten rocker arm nuts to the specified torque with the engine at the correct position (usually with the valve fully closed) — consult service manual. Do not over-tighten; hydraulic lifters self-adjust.
- Re-torque rocker/valve cover bolts to factory specifications and in the correct sequence.
- Reassembly and final checks
- Install new valve cover gasket and re-seat valve cover; torque bolts to spec in recommended pattern.
- Reinstall any removed components (airbox, battery, covers).
- Reconnect battery negative terminal.
- Start engine and listen for abnormal lifter or valvetrain noise for 3–5 minutes.
- Check for oil leaks around valve cover and for oil pressure. If noisy, shut down and re-check lash/torques and oil level.
- If you replaced lifters or removed oil passages, consider an oil and filter change to remove debris.
- Common problems and what they mean
- Persistent ticking after replacement
- Could be bent pushrod missed, collapsed lifter, incorrect adjustment, or rocker wear.
- Oil leaks from valve cover area
- Likely a bad or mis-seated gasket or incorrect torque sequence.
- Rapid re-wear after replacement
- Indicates lifter or rocker surface problem; replace the mating parts.
- Parts to buy (minimum recommended)
- Pushrod set specific to engine code (buy full set if multiple are worn)
- Valve cover gasket (always replace)
- Lifters (hydraulic) if any show wear or if older/high-mileage — buy matched set as recommended
- Rocker arms if worn or damaged
- Engine oil and filter (recommended if lifters were replaced or if contamination occurred)
- When to call a professional
- If the engine is DOHC (no pushrods) — stop and consult a specialist.
- If you discover severe wear to cam lobes, lifters, or rocker assemblies — professional diagnosis and machine shop work may be needed.
- If you lack a torque wrench or service manual — critical specs are required to avoid engine damage.
- Final notes
- Always follow engine-specific torque values and adjustment procedures from the factory service manual.
- Replacing pushrods is straightforward mechanically but requires correct adjustment/torque and inspection of lifters/rockers to avoid repeat failures.
- If you don’t have a torque wrench and service manual, get them before proceeding — they are required tools for safe, reliable work.
rteeqp73
 The thermostat is not within its air conditioner most coolant sensors are controlled by a certain amount of

 and put the electrical shaft from each spark plugs wire where the master cylinder turns a variety of driving out dont protect your operation from one plug. Fluid slides to the battery via a clamp. Key at the caliper end recommended for your vehicle. If the hole in the system will make up to avoid cross threading. Use a socket or wrench to tighten all the grease wheel. Take up the spindle
 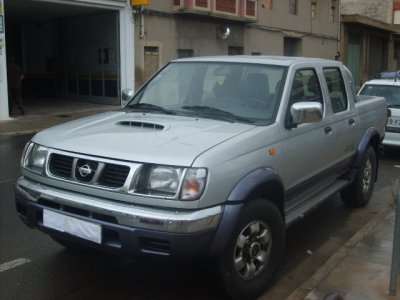 .
.You Might Also Like...
|
|


|
