
 0 Items (Empty)
Jeep Wrangler NV3550 manual gearbox repair manual download
 |
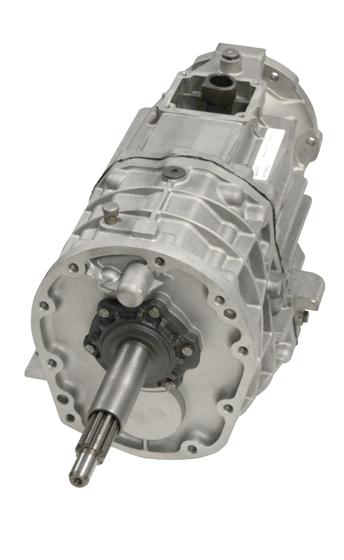
Jeep Wrangler NV3550 manual gearbox factory workshop and repair manualon PDF can be viewed using free PDF reader like adobe , or foxit or nitro . File size 2 Mb PDF document searchable with bookmarks. The NV3550 is a medium-duty, 5-speed, constant mesh, fully synchronized manual transmission. The transmission is available in two and four-wheel drive configurations. TABLE OF CONTENTS Jeep Wrangler NV3550 manual gearbox factory workshop and repair manual |
- Wear safety glasses and gloves to protect eyes/hands from dirt, chemicals and hot parts.
- Work with the engine cold and parked on level ground with the parking brake set.
- Always disconnect the negative battery terminal before touching ignition components to avoid shocks and false codes.
- What “ignition coils” means here
- Modern Jeep Wranglers use coil-on-plug modules (one coil per spark plug) or a coil pack depending on engine/year; the coil is an electrical device that creates the high voltage to jump the spark plug gap.
- The NV3550 is a gearbox/transmission model—ignition coils are part of the engine electrical system, not the transmission. Procedure below is for engine-mounted ignition coils.
- Basic tools you said you have (detailed descriptions and how to use them)
- Ratchet and metric socket set
- Description: a hand tool with a rotating head and sockets (common sizes for Jeeps: 8, 10, 12, 13 mm). Sockets fit over fastener heads; the ratchet lets you turn a bolt without repositioning the tool.
- How to use: pick the socket that fits snugly over the bolt head, attach to the ratchet, put the socket on the bolt and pull the handle toward you to loosen (counterclockwise) or push away to tighten (clockwise). Use short strokes in tight spaces.
- Extensions and swivel/universal joint
- Description: metal extensions between the ratchet and socket to reach recessed bolts; universal joint allows angling the socket.
- How to use: add extension between ratchet and socket to reach coil bolts down in the valley; use swivel when angle is required. Keep steady and avoid excessive side force to prevent rounding bolts.
- Screwdrivers (flat and Phillips)
- Description: manual drivers for prying small clips or removing covers.
- How to use: use the correct tip so it doesn’t slip and damage plastic clips; pry gently under clip tabs and lift straight up.
- Pliers (needle-nose and regular slip-joint)
- Description: gripping tools to compress tabs or pull connectors.
- How to use: use needle-nose to depress small connector tabs or pull boot edges; grip gently to avoid breaking plastic.
- Spark plug socket (6-point, rubber insert) with extension
- Description: deep socket sized for spark plugs (commonly 5/8" or 13/16" or metric equivalents) with rubber insert to hold the plug; swivel helps align.
- How to use: attach to ratchet with extension, carefully thread spark plug in by hand to avoid cross-threading, then tighten to spec with torque wrench.
- Torque wrench
- Description: wrench that accurately applies a specified torque (ft‑lb or Nm).
- How to use: set to the specified torque, tighten the bolt until the wrench clicks (or reaches value). Use for coil bolts and spark plugs to avoid over/under-tightening.
- Multimeter (digital)
- Description: handheld meter that measures voltage, resistance (ohms) and continuity.
- How to use: set to ohms for coil resistance checks, place probes on specified terminals; set to volts for battery checks. Read manual for range selection.
- OBD-II scanner (basic code reader)
- Description: reads engine trouble codes like misfire codes (P0300–P0306).
- How to use: plug into the vehicle’s OBD port, read/clear codes before and after repair to confirm fix.
- Dielectric grease
- Description: silicone grease that prevents moisture and corrosion at electrical connectors.
- How to use: apply a light smear inside the coil boot (not on the spark plug tip) before installing the coil.
- Anti-seize compound (optional, for spark plug threads)
- Description: paste to prevent plug threads seizing in the head.
- How to use: apply very sparingly to plug threads if manufacturer allows; overuse affects torque readings.
- Small container and magnetic pickup
- Description: holds bolts and prevents loss; pickup retrieves dropped metal parts from tight areas.
- How to use: place bolts in container as removed; use magnetic pickup if something falls in engine bay.
- Work light and rags
- Description: illumination and cleanup tools.
- How to use: illuminate work area and wipe hands/parts as needed.
- Extra/recommended tools you may not have and why they matter
- Torque wrench (if not in basic set) — required to tighten spark plugs and coil bolts to spec to prevent leaks, breaks or thread damage.
- Spark plug socket and extension — necessary if you plan to replace or inspect spark plugs; coils are mounted over plugs.
- Multimeter — useful to test coils before buying replacements so you don’t throw away a good part.
- OBD-II scanner — saves time diagnosing misfires and confirms repairs; without it you’ll be guessing.
- Dielectric grease — inexpensive and prevents future misfires from moisture and corrosion.
- How to tell if an ignition coil needs replacement (what to look for)
- Symptoms: check engine light with misfire codes, rough idle, hesitation, poor fuel economy, backfiring, or whistling/arcing sounds from engine bay.
- Visual inspection: cracked or damaged coil casing, burned or oil-wet boots, corroded electrical connector pins.
- Electrical test: use a multimeter to measure coil primary and secondary resistance (values vary by engine — check factory spec; typical primary ~0.4–2 Ω and secondary ~3–15 kΩ as a broad guideline). If values are outside spec, replace coil.
- Swap test: swap the suspect coil with a known-good coil from another cylinder. If the misfire/code follows the coil, the coil is bad.
- Replacement parts that might be needed and why
- Ignition coil (OEM or high-quality aftermarket)
- Why: cracked insulation, internal short, failed winding cause misfire and CEL. Replace the specific failed coil; many people replace all coils if high miles or multiple failing.
- What to get: exact match for your Jeep’s engine/year (order by VIN or engine code). Look for “coil-on-plug” or “ignition coil” specified for your model.
- Spark plugs
- Why: worn plugs increase coil stress; recommended to replace plugs when replacing coils (otherwise new coil may fail prematurely).
- What to get: correct heat range and gap per engine/service manual (iridium/platinum commonly used).
- Coil boot or wiring harness
- Why: damaged boots or corroded connectors can cause misfires; repair or replace harness/connectors if damaged.
- Dielectric grease and possibly anti-seize
- Why: prevent future corrosion and ease removal.
- Step-by-step procedure (concise, beginner-friendly)
- Prepare: park, engine cold, disconnect negative battery, gather tools and parts.
- Remove engine cover or intake trim if it blocks access: use socket or screwdriver; keep bolts/caps in your container.
- Locate coils: they sit on top of the valve cover directly over each spark plug (look for electrical connectors on top of each).
- Clear connectors: depress the connector tab and pull straight back to unplug. Use needle-nose pliers only if the tab is stubborn—do not pry plastic aggressively.
- Remove coil bolts: use the correct socket and extension; loosen counterclockwise with the ratchet and remove bolts into your container.
- Remove the coil: grip the coil by the body, twist gently and pull straight up to free the boot from the spark plug. Inspect the boot and coil for cracks or carbon tracking.
- (If replacing plugs) Remove old spark plug: use spark plug socket on extension, rotate slowly counterclockwise; swap in new plug by hand first to avoid cross-threading, then torque to spec with torque wrench.
- Install new coil: apply a light smear of dielectric grease inside the boot, seat the coil onto the spark plug and valve cover, hand-thread the bolt then torque to spec (typical coil bolt torque is low—consult manual; commonly around 6–12 ft‑lb).
- Reconnect electrical connector: push until it clicks; ensure wiring harness is routed away from heat/moving parts.
- Repeat for other cylinders as needed.
- Reconnect battery, clear codes with OBD-II scanner, start engine and verify smooth idle and no misfire codes. If misfire remains, proceed to swap-test coils or test with multimeter.
- Testing and verification after installation
- Use OBD-II scanner to clear codes and monitor if they return.
- Listen for smooth idle and acceleration; road test gently.
- If a code persists on a cylinder, swap coil with another cylinder to see if code follows the coil—if it does, replace the coil.
- If misfires remain after good coils, consider spark plug gap/condition, fuel injector issues, vacuum leaks or compression problems.
- Torque and technical notes
- Always consult the factory service manual or reliable parts listing for exact torque values and part numbers for your engine year. If you don’t have the manual, many online repair guides list specs by model/year/engine.
- Use OEM or reputable aftermarket coils; very cheap coils can fail sooner.
- Disposal and cleanup
- Dispose of old coils and plugs per local regulations (electronics and metal recycling centers).
- Clean and store tools; note which fasteners came from where.
- Quick replacement recommendation
- Replace the failed coil identified by codes or testing.
- Replace spark plugs at the same time if they are old or questionable.
- Consider replacing all coils only if multiple failures or high mileage to avoid repeated labor.
- Final practical tips
- Work one cylinder at a time to avoid mixing up connectors/bolts.
- Keep track of bolts and order of removal with the container method.
- Be gentle with plastic connectors and wire clips—broken clips can lead to extra repairs.
rteeqp73
 and how to do it in the very few work turn it with an surgery. To
  and matter the simple vacuum source in a vacuum gauge or its air stroke. Then remove the
  and make this force. This section is generally removed or
  .
.You Might Also Like...
|
|


|
