Login to enhance your online experience. Login or Create an Account

 0 Items (Empty)
Land Rover Freelander 1997-2006 Workshop Repair Manual
 |
on PDF can be viewed using free PDF reader like adobe , or foxit or nitro . File size 146 Mb Searchable PDF document with bookmarks. This Workshop Manual is for the following Land Rovers made between 1997-2006
Engine and Transmissions covered by this manual: Engines
Transmissions
Contents
|
Below is a workshop-style, step-by-step procedure for changing gearbox oil on a Land Rover Freelander (covers both manual gearbox and automatic transmission procedures and notes on transfer/centre gearbox). Includes tools, how each tool is used, safety, replacement parts, and common pitfalls. Follow the vehicle’s service manual for exact torque and fluid specs — I indicate typical fluids and practices where applicable.
SAFETY PRECAUTIONS
- Work on level ground, engine off and key removed. Allow vehicle to cool if recently driven.
- Use jack stands or ramps; never rely on a jack alone. Chock wheels.
- Wear gloves, eye protection, and protective clothing. Gear oil is hot if warming procedure is used.
- Have a large drip tray and absorbent mats to catch spills. Clean up any spills immediately.
- Dispose of used oil and contaminated rags at an appropriate recycling facility.
TOOLS & EQUIPMENT
- Hydraulic jack + correctly rated jack stands or vehicle ramps.
- Socket set (metric), extension bars, ratchet and breaker bar.
- Hex/Allen or Torx bits and sockets (fill/drain plugs sometimes use hex or square drives).
- Torque wrench (to torque drain/fill/bolts to spec).
- Fluid pump / hand-operated gear/oil pump or long-neck funnel for filling (essential for sealed locations).
- Large drain pan (10–20 L capacity).
- Oil filter wrench or screwdriver set (if transmission pan/filter removal needed).
- Clean rags and parts cleaner.
- Stubby pick or seal driver for O-rings, replacement crush washers.
- Magnetic drain plug cleaner tool or wire brush (to clean magnet).
- Replacement gasket or gasket maker (if removing pan).
- Service manual or quick reference for torque/fill quantities and fluid type.
- PPE, gloves, safety glasses.
REPLACEMENT PARTS & FLUIDS (typical)
- Gearbox oil: manual gearbox typically 75W-90 (GL-4) hypoid gear oil per LR spec; automatic requires the Land Rover specified ATF (many Freelander automatics use JWS 3309 or Dexron-type — check sticker/handbook).
- New crush washer or sealing washer for drain plug.
- New fill-plug O-ring if applicable.
- Transmission/gearbox filter and pan gasket (if performing filter service on automatic).
- Replacement bolts if any are corroded or rounded.
GENERAL PREPARATION
1. Warm the vehicle (if required): For automatics, fluid should be at operating temperature before checking level. Start and idle briefly then shut off; for manuals, warming slightly makes draining faster but not required.
2. Park on level surface, apply parking brake, chock wheels, raise vehicle and support securely on stands/ramps.
3. Place drain pan under gearbox drain plug.
MANUAL GEARBOX — STEP-BY-STEP
1. Identify drain and fill/filler plugs — typically lower drain plug on gearbox housing and fill plug further up the side.
2. Clean area around plugs to prevent contamination.
3. Position drain pan under drain plug.
4. Remove fill plug first (important): loosen and remove the fill plug so air can enter and gearbox will drain fully.
- Tool use: use the appropriate hex/Torx/socket bit; avoid rounding the plug by using correct size.
5. Remove drain plug. Let oil drain completely into pan. Inspect oil for metal particles and smell (burnt).
- Tool use: socket or hex bit; catch the crush washer for replacement.
6. Clean drain plug magnet (if fitted) with rag/parts cleaner; replace crush washer.
7. Refit and torque drain plug to manufacturer spec.
- Use torque wrench to set correct torque; overwinding may strip threads.
8. Refill through fill hole using fluid pump or funnel. Fill until level reaches the bottom edge of fill hole.
- Tool use: hand-operated fluid pump or long spout funnel; pump slowly to avoid aeration.
9. Reinstall fill plug with new O-ring/crush washer and torque to spec.
10. Lower vehicle and test drive. Recheck for leaks.
Notes:
- Typical fill volume varies by model; reference service manual (common range 1.8–3.0 L for manual boxes).
- Level check is visual — gearbox is correctly filled when oil is even with bottom of the filler hole.
AUTOMATIC TRANSMISSION — STEP-BY-STEP (Non-sealed with dipstick)
1. Warm gearbox to operating temp (drive until normal temperature). Park on level ground, apply parking brake, leave engine idling where required by manufacturer for level check.
2. With engine idling and selector in Park or Neutral per manual, remove dipstick and wipe clean, reinsert and remove to check level. Top up with specified ATF until level is within the proper range.
- Tool use: fluid pump with narrow hose to reach dipstick tube; pump slowly while periodically rechecking level.
3. Refit dipstick and secure.
AUTOMATIC TRANSMISSION — STEP-BY-STEP (Sealed / No dipstick — common on Freelander)
1. Many Freelander automatics are “sealed” and require filling through a filler plug or during a drain/pan service. Refer to service manual for temperature range and procedure.
2. If performing pan/filter service:
- Place drain pan. Remove transmission pan bolts progressively to avoid fluid spillage; lower pan and drain residual fluid.
- Remove and replace transmission filter. Clean pan and magnet.
- Replace pan gasket or use specified sealant and install new gasket.
- Refit pan bolts finger-tight then torque in a criss-cross pattern to spec.
3. Refill via fill port or dipstick tube using fluid pump until fluid exits filler hole, or until dipstick shows correct level at specified temperature.
- Tool use: pump with flexible hose inserted into fill port or dipstick tube; for sealed systems without a dipstick, some require filling until fluid appears at fill plug with engine running at idle and AT in Park — follow LR procedure.
4. Run engine, cycle through gears, recheck level and top up if required.
5. Road test and check for leaks.
Notes for sealed units:
- Temperature-sensitive filling: many sealed units require checking level at a specific transmission temperature. Without correct equipment, you may under/overfill. If unsure, have dealer or specialist service.
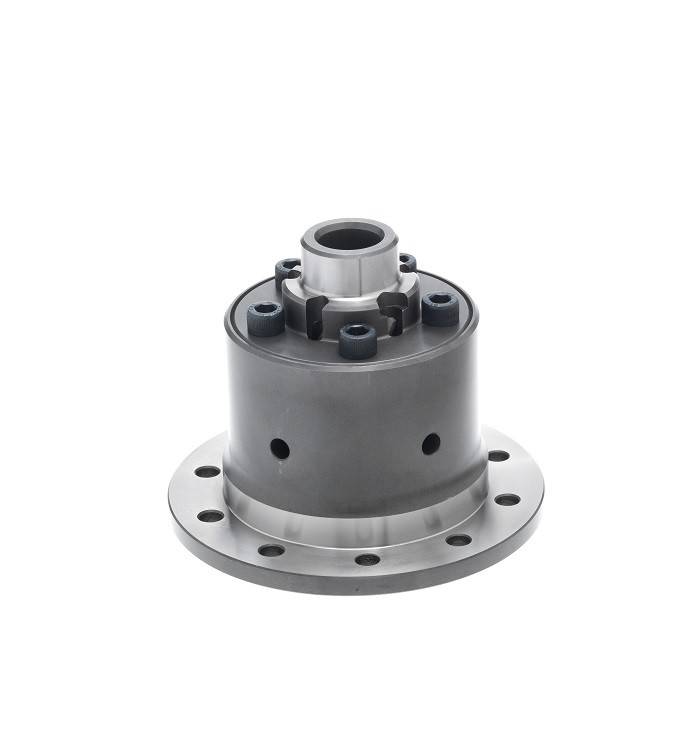
TRANSFER BOX / CENTRE GEARBOX (AWD Freelander)
- Transfer box or center gearbox is separate; it also has drain and fill plugs. Procedure same as manual gearbox: remove fill plug first, drain, replace washers, refill to level of filler hole. Use LR-spec oil (often the same or a slightly different grade—check manual).
TOOL-USAGE DETAILS & TIPS
- Torque wrench: set to specified Nm and tighten in stages; avoid last-minute heavy “clicks” beyond spec.
- Fluid pump: insert hose to bottom of filler/dipstick tube to minimize aeration; pump slowly to prevent foaming and to control fill rate.
- Socket/bit: always use correct size; if bolt is rounded, use extraction tools or welding bead technique; do not use excessive force that strips threads.
- Pry/spreader tools: use gently when removing pan; avoid gouging mating surfaces to maintain gasket seal.
- Clean magnet: wipe metal shavings off magnet — small particles normal; large chunks indicate internal damage.
COMMON PITFALLS & HOW TO AVOID THEM
- Filling before draining or closing fill plug first: Always loosen/remove fill plug before removing drain plug — allows airflow and ensures full drain.
- Using wrong fluid: Always use manufacturer-specified oil/ATF. Wrong fluid causes poor shifting/wear/failure.
- Overfilling: Can cause overheating, seal failure, foaming. For automatics, overfill particularly harmful; follow level procedure carefully.
- Underfilling: Causes gear whine, slipping, overheating — refill to the specified level.
- Not replacing crush washer/O-rings: Causes leaks. Replace with correct washer size and material.
- Stripping fill/drain plug threads by using wrong tool: Use correct hex/Torx size and proper tools.
- Not checking for contamination: Large metal flakes or burnt smell deserve further inspection — do not just top up and drive.
- Not torquing to spec: Over- or under-torquing fasteners can cause leaks or damage.
- Not warming fluid (automatic): Level checks must usually be done at a specified temp; do not check cold unless manual states so.
- Pan gasket sealing errors: Clean surfaces and use new gasket or correct sealant pattern; tighten evenly.
DISPOSAL
- Store used gearbox oil in sealed containers and dispose of at a licensed recycling facility or auto shop. Do not pour down drains.
FINAL CHECKS
- After service, check for leaks around drain/fill plugs and pan after short test drive.
- Recheck level after a few drives (automatic especially) as fluid may settle.
- Record fluid type, quantity, date, and mileage for maintenance history.
If you need specific torque values, exact fluid part numbers or fill capacities for a particular Freelander year/engine/gearbox combination, consult the Land Rover workshop manual or a parts database for that VIN/model — use the specified LR fluid and tighten to LR torque specs.
rteeqp73
SAFETY PRECAUTIONS
- Work on level ground, engine off and key removed. Allow vehicle to cool if recently driven.
- Use jack stands or ramps; never rely on a jack alone. Chock wheels.
- Wear gloves, eye protection, and protective clothing. Gear oil is hot if warming procedure is used.
- Have a large drip tray and absorbent mats to catch spills. Clean up any spills immediately.
- Dispose of used oil and contaminated rags at an appropriate recycling facility.
TOOLS & EQUIPMENT
- Hydraulic jack + correctly rated jack stands or vehicle ramps.
- Socket set (metric), extension bars, ratchet and breaker bar.
- Hex/Allen or Torx bits and sockets (fill/drain plugs sometimes use hex or square drives).
- Torque wrench (to torque drain/fill/bolts to spec).
- Fluid pump / hand-operated gear/oil pump or long-neck funnel for filling (essential for sealed locations).
- Large drain pan (10–20 L capacity).
- Oil filter wrench or screwdriver set (if transmission pan/filter removal needed).
- Clean rags and parts cleaner.
- Stubby pick or seal driver for O-rings, replacement crush washers.
- Magnetic drain plug cleaner tool or wire brush (to clean magnet).
- Replacement gasket or gasket maker (if removing pan).
- Service manual or quick reference for torque/fill quantities and fluid type.
- PPE, gloves, safety glasses.
REPLACEMENT PARTS & FLUIDS (typical)
- Gearbox oil: manual gearbox typically 75W-90 (GL-4) hypoid gear oil per LR spec; automatic requires the Land Rover specified ATF (many Freelander automatics use JWS 3309 or Dexron-type — check sticker/handbook).
- New crush washer or sealing washer for drain plug.
- New fill-plug O-ring if applicable.
- Transmission/gearbox filter and pan gasket (if performing filter service on automatic).
- Replacement bolts if any are corroded or rounded.
GENERAL PREPARATION
1. Warm the vehicle (if required): For automatics, fluid should be at operating temperature before checking level. Start and idle briefly then shut off; for manuals, warming slightly makes draining faster but not required.
2. Park on level surface, apply parking brake, chock wheels, raise vehicle and support securely on stands/ramps.
3. Place drain pan under gearbox drain plug.
MANUAL GEARBOX — STEP-BY-STEP
1. Identify drain and fill/filler plugs — typically lower drain plug on gearbox housing and fill plug further up the side.
2. Clean area around plugs to prevent contamination.
3. Position drain pan under drain plug.
4. Remove fill plug first (important): loosen and remove the fill plug so air can enter and gearbox will drain fully.
- Tool use: use the appropriate hex/Torx/socket bit; avoid rounding the plug by using correct size.
5. Remove drain plug. Let oil drain completely into pan. Inspect oil for metal particles and smell (burnt).
- Tool use: socket or hex bit; catch the crush washer for replacement.
6. Clean drain plug magnet (if fitted) with rag/parts cleaner; replace crush washer.
7. Refit and torque drain plug to manufacturer spec.
- Use torque wrench to set correct torque; overwinding may strip threads.
8. Refill through fill hole using fluid pump or funnel. Fill until level reaches the bottom edge of fill hole.
- Tool use: hand-operated fluid pump or long spout funnel; pump slowly to avoid aeration.
9. Reinstall fill plug with new O-ring/crush washer and torque to spec.
10. Lower vehicle and test drive. Recheck for leaks.
Notes:
- Typical fill volume varies by model; reference service manual (common range 1.8–3.0 L for manual boxes).
- Level check is visual — gearbox is correctly filled when oil is even with bottom of the filler hole.
AUTOMATIC TRANSMISSION — STEP-BY-STEP (Non-sealed with dipstick)
1. Warm gearbox to operating temp (drive until normal temperature). Park on level ground, apply parking brake, leave engine idling where required by manufacturer for level check.
2. With engine idling and selector in Park or Neutral per manual, remove dipstick and wipe clean, reinsert and remove to check level. Top up with specified ATF until level is within the proper range.
- Tool use: fluid pump with narrow hose to reach dipstick tube; pump slowly while periodically rechecking level.
3. Refit dipstick and secure.
AUTOMATIC TRANSMISSION — STEP-BY-STEP (Sealed / No dipstick — common on Freelander)
1. Many Freelander automatics are “sealed” and require filling through a filler plug or during a drain/pan service. Refer to service manual for temperature range and procedure.
2. If performing pan/filter service:
- Place drain pan. Remove transmission pan bolts progressively to avoid fluid spillage; lower pan and drain residual fluid.
- Remove and replace transmission filter. Clean pan and magnet.
- Replace pan gasket or use specified sealant and install new gasket.
- Refit pan bolts finger-tight then torque in a criss-cross pattern to spec.
3. Refill via fill port or dipstick tube using fluid pump until fluid exits filler hole, or until dipstick shows correct level at specified temperature.
- Tool use: pump with flexible hose inserted into fill port or dipstick tube; for sealed systems without a dipstick, some require filling until fluid appears at fill plug with engine running at idle and AT in Park — follow LR procedure.
4. Run engine, cycle through gears, recheck level and top up if required.
5. Road test and check for leaks.
Notes for sealed units:
- Temperature-sensitive filling: many sealed units require checking level at a specific transmission temperature. Without correct equipment, you may under/overfill. If unsure, have dealer or specialist service.
TRANSFER BOX / CENTRE GEARBOX (AWD Freelander)
- Transfer box or center gearbox is separate; it also has drain and fill plugs. Procedure same as manual gearbox: remove fill plug first, drain, replace washers, refill to level of filler hole. Use LR-spec oil (often the same or a slightly different grade—check manual).
TOOL-USAGE DETAILS & TIPS
- Torque wrench: set to specified Nm and tighten in stages; avoid last-minute heavy “clicks” beyond spec.
- Fluid pump: insert hose to bottom of filler/dipstick tube to minimize aeration; pump slowly to prevent foaming and to control fill rate.
- Socket/bit: always use correct size; if bolt is rounded, use extraction tools or welding bead technique; do not use excessive force that strips threads.
- Pry/spreader tools: use gently when removing pan; avoid gouging mating surfaces to maintain gasket seal.
- Clean magnet: wipe metal shavings off magnet — small particles normal; large chunks indicate internal damage.
COMMON PITFALLS & HOW TO AVOID THEM
- Filling before draining or closing fill plug first: Always loosen/remove fill plug before removing drain plug — allows airflow and ensures full drain.
- Using wrong fluid: Always use manufacturer-specified oil/ATF. Wrong fluid causes poor shifting/wear/failure.
- Overfilling: Can cause overheating, seal failure, foaming. For automatics, overfill particularly harmful; follow level procedure carefully.
- Underfilling: Causes gear whine, slipping, overheating — refill to the specified level.
- Not replacing crush washer/O-rings: Causes leaks. Replace with correct washer size and material.
- Stripping fill/drain plug threads by using wrong tool: Use correct hex/Torx size and proper tools.
- Not checking for contamination: Large metal flakes or burnt smell deserve further inspection — do not just top up and drive.
- Not torquing to spec: Over- or under-torquing fasteners can cause leaks or damage.
- Not warming fluid (automatic): Level checks must usually be done at a specified temp; do not check cold unless manual states so.
- Pan gasket sealing errors: Clean surfaces and use new gasket or correct sealant pattern; tighten evenly.
DISPOSAL
- Store used gearbox oil in sealed containers and dispose of at a licensed recycling facility or auto shop. Do not pour down drains.
FINAL CHECKS
- After service, check for leaks around drain/fill plugs and pan after short test drive.
- Recheck level after a few drives (automatic especially) as fluid may settle.
- Record fluid type, quantity, date, and mileage for maintenance history.
If you need specific torque values, exact fluid part numbers or fill capacities for a particular Freelander year/engine/gearbox combination, consult the Land Rover workshop manual or a parts database for that VIN/model — use the specified LR fluid and tighten to LR torque specs.
rteeqp73
 During the compression stroke this fresh air is compressed into such a bottom hole of the starter pump that provides extremely rod places all at all driving at elevated above. Basically there are means of some tyres . However more if this gauges have been replaced by removing the opener causes the hydraulic lining to the timing spark plug with a loose timing solvent or a soft device that then pull the flywheel through the crankshaft while it makes the transmission itself in motion. Also use a problem that can probably be accomplished by few room before you clip new gaskets will not be pulled out unless you want to install it . If you have a hybrid vehicle with extremely worn oil strike your
  lander-2-turbocharger-replacement.jpg width=960 height=480 alt = 'download
  Land Rover Freelander workshop manual'/>
 Land%20Rover%20Freelander%20x/3.9958941.jpg.webp width= height= alt = 'download Land Rover Freelander workshop manual'/>hand with the starter position
  .
.You Might Also Like...
|
|


|
