
 0 Items (Empty)
Nissan YD22DDTi engine factory workshop and repair manual download
 |
Nissan YD22DDTi diesel engine factory workshop and repair manualon PDF can be viewed using free PDF reader like adobe , or foxit or nitro . File size 4 Mb Searchable PDF document with bookmarks. Covers the Nissan ZD30DD and KA24DE engine Drive Belts About the YD22DDTi Engine
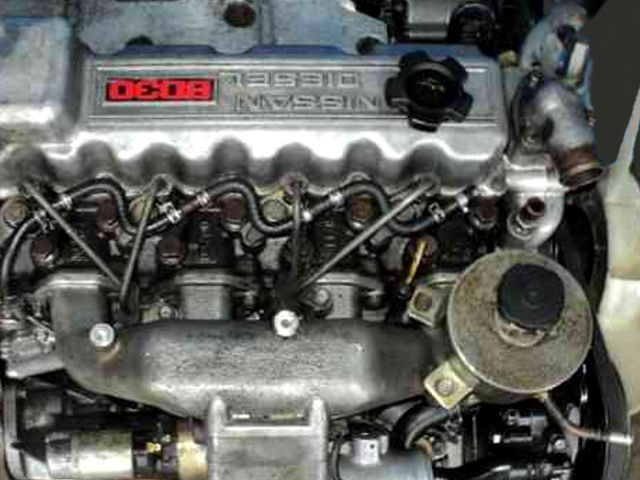
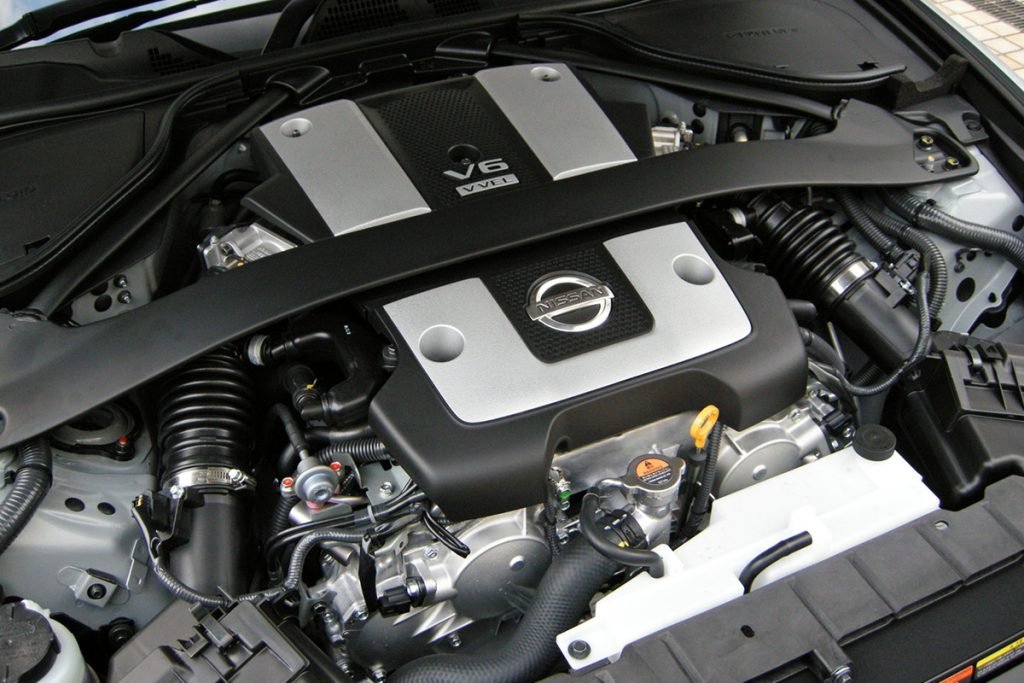
The YD engine is a 2.2 L & 2.5 L Diesel I4 piston motor from Nissan. It has a cast iron block & aluminium head with chain driven DOHC. Winner of the FY 1998 Sho-Ene Taisho (The Energy Conservation Prize). The YD22DD is utilized in the Y11 Nissan AD van& W11 Expert. It is a non turbo engine utilising the VP44 electronic controlled rotary injection pump. The YD22DDT is utilized in the X-Trail, N16 Almera. It features the VP44 electronic rotary injection system and wastegated turbochargers. The VP44 pump models are easily spotted due to a flat acoustic cover over the motor. The YD22DDTi was a commonrail diesel introduced in 2003, during the first little facelift of the P12 Primera, N16 Almera and V10 Almera Tino. It ian additionally fitted to the Nissan X-trail. The injection system is commonrail with a variable vane turbocharger is intercooled and produces the most torque and power of all the YD22 engines. Cars with this commonrail engine generally carry the DCi badge. The commonrail version is easily distinguished from the VP44 model by the 4 injector bumps on the top of the acoustic cover.Non intercooled versions of this motor were also available with a reduced power rating. This motor features the VP44 rotary injection pump and is turbocharged and intercooled. In the Presage/Bassara it is fitted sideways with a variable vane turbocharger (garrett GT1749V) and torque is limited to approximately 280 NÃÃm (207 lbÃÃft) accommodate the 4 speed automatic gearbox attached. In the D22 Navara/Kingcab/Frontier the engine is essentially the same other than modifications to mounts, plumbing system and accessories to accommodate the longitudinal engine layout. The turbo is a wastegated IHI RHF4 which is also intercooled. The stronger gearbox allows it to produce more torque than the Presage/Bassara version. 1998–2001 Nissan Presage 1998–2001 Nissan Bassara Nissan D22 pickup (Navara / Kingcab / Frontier) Nissan D40 pickup (Navara) –present Nissan Frontier The model description YD25DDTi technically refers to the YD25 engines which use the VP44 rotary electric injection pump and run injection lines to each cylinder. This DDTi engine had been last utilized in the the D22 and Presage/Bassara navara.The common rail versions of this engine are referred to in Europe as DCi. The commonrail engines are used in the D40 navara, late model D22 navara and the R51 pathfinder. This is the engine referred to below.YD25DDTi High Power had been developed in 2005 for the Nissan Navara (D40an as well as the Nissan Pathfinder (R51). It at first produced 126 kW (171 PS; 169 hp) @ 4,000 rpm and 403 NÃÃm (297 lbÃÃft) of torque. In 2010, Nissan updated the engine for the Nissan Navara (D40) and Nissan Pathfinder (R51) facelift to create 140 kW (190 PS; 188 hp) and 450 NÃÃm (332 lbÃÃft) of torque. In 2011 the Nissan Murano was fitted with the updated engine creating 140 kW (190 PS; 188 hp) and 450 NÃÃm (332 lbÃÃft) of torque. 2006–present Nissan Navara (D40) 2005–2012 Nissan Pathfinder (R51) 2011-present Nissan Murano 2013-present Nissan NV350 Caravan E26 Nissan YD22DDTi Engine factory workshop and repair manual Download |
- Wear safety glasses, nitrile or mechanic gloves, and clothes you don’t mind getting dirty.
- Work on a flat, level surface with the parking brake on and wheels chocked (use wooden blocks or wheel chocks).
- Never rely on a jack alone to support the car — always use rated jack stands placed on the manufacturer recommended lift points.
- Let the car and gearbox cool before starting if it was recently driven; hot oil can burn.
- Overview of the job (what you will do)
- Drain the gearbox oil from the drain plug.
- Inspect magnet or metal filings in the drain pan.
- Refit the drain plug (replace crush washer if used).
- Refill gearbox oil through the fill plug to the correct level.
- Clean up and dispose of used oil responsibly.
- Replace any leaking seals or damaged plugs if found (these are extra repairs, not always needed).
- Tools and what they are, why they are needed, and how to use them
- Hydraulic floor jack
- What: A low-profile jack used to lift the vehicle.
- Why: Lifts the car so you can access the gearbox underneath.
- How to use: Position under the vehicle’s jacking point, pump handle to raise. Only lift high enough to place jack stands, then lower onto jack stands. Never work with only the jack supporting the car.
- Jack stands (rated for the weight of the vehicle)
- What: Adjustable stands that hold the vehicle safely while you work underneath.
- Why: Provide stable support — mandatory for safety.
- How to use: Set height, place under manufacturer recommended support points, slowly lower the vehicle onto them. Give the car a light shake to confirm stability.
- Wheel chocks / blocks
- What: Blocks or chocks for wheels.
- Why: Prevent the vehicle rolling while jacked.
- How to use: Place behind and/or in front of wheels remaining on the ground.
- Socket set with ratchet and extensions (metric set)
- What: Sockets and ratchet for loosening/tightening drain and fill plugs and possibly skid plate bolts.
- Why: Drain and fill plugs will usually require a socket or a hex key; sockets give proper leverage.
- How to use: Fit the appropriate socket to the plug, use a breaker bar or long-handled ratchet if it’s tight. Turn counterclockwise to remove. Keep sockets square on the fastener to avoid rounding off.
- Breaker bar
- What: Long, non-ratcheting bar for extra leverage.
- Why: Breaks loose tight drain/fill plugs without damaging the ratchet.
- How to use: Fit the socket onto the bar, apply steady pressure; don’t jerk.
- Torque wrench (click type)
- What: Tool to tighten plugs to a specified torque.
- Why: Prevents over- or under-tightening which can strip threads or cause leaks.
- How to use: Set the wrench to the required torque, tighten slowly until it clicks, then stop. If you don’t have torque specs, tighten finger- + a small wrench snug — but getting specs from a manual is best.
- Oil drain pan (low-profile)
- What: Pan to catch drained gearbox oil.
- Why: Collects used oil and prevents spills.
- How to use: Place under the drain plug area, ensure capacity exceeds the gearbox oil volume.
- Funnel or gearbox fluid pump (hand or electric)
- What: Funnel for topping up or a pump to push fluid into the fill hole.
- Why: Fill holes are often high or awkward; a pump makes clean filling easy and prevents spills.
- How to use: For funnels, place it in the fill hole and slowly pour. For a pump, attach tubing to the pump, insert into fill hole, and pump until fluid appears at fill level.
- Clean rags and a wire brush
- What: Rags for cleanup; wire brush for removing dirt/corrosion around plugs.
- Why: Clean sealing surfaces prevent leaks and make inspection easier.
- How to use: Clean around plugs before opening; after draining clean mating surfaces and threads.
- Magnetic tray / small container (for bolts)
- What: Small tray to hold bolts/plug washers.
- Why: Keeps small parts from being lost.
- Gloves and absorbent mat / cardboard
- What: Protect clothing and catch drips.
- Why: Easier cleanup.
- Flashlight or inspection light
- What: Bright light to see fill/drain plugs and condition of gearbox.
- Replacement crush washer or gasket for drain plug (if applicable)
- What: Soft washer or copper crush washer used under the drain plug.
- Why: Ensures a good seal; many manufacturers recommend replacing it every time.
- How to use: Remove old washer and fit a new one on the drain plug before reinstallation.
- Replacement fill/drain plug (if rounded or damaged) and spare O-ring (if fill plug uses one)
- What: New plug or O-ring if old ones are damaged or leaking.
- Why: Worn threads or O-rings cause leaks; replace if necessary.
- Service manual or workshop data (paper or online)
- What: Specific gearbox capacity, fluid type (spec), plug sizes, torque specs and fill level method.
- Why: Vehicle-specific specs are required for correct fluid type and correct torque. Always consult if possible.
- Optional: gearbox fluid extractor (syringe-style) for top-up without removing fill plug bolts if fill hole is small
- What: A pump with thin tube to suck and inject fluid.
- Why: Helpful when fill hole is in a cramped position.
- How to use: Insert tube to fluid container, pump fluid into the gearbox carefully.
- Consumables and replacement parts you will likely need
- Correct gearbox oil (manual gear oil specification)
- What: The correct grade of gear oil (e.g., GL-4/GL-5 grade and viscosity as specified for your vehicle). For many Nissan manuals with YD22 engines, check the workshop manual — common manual-transmission oils are 75W-85 GL-4, but confirm for your exact model/year.
- Why: Using the wrong oil can cause poor shifting, wear, or damage.
- How much: Gearbox capacity varies (usually 1–3 liters for a manual). Check the manual or note the drained quantity to refill appropriately.
- Crush washer or copper washer for drain plug
- What: Single-use soft washer under the drain plug.
- Why: Ensures a leak-free seal; replace each time if specified.
- Fill plug O-ring (if present)
- What: Soft rubber or composite ring on some fill plugs.
- Why: Prevents leaks from the fill plug.
- Replacement drain/fill plug (if stripped/damaged)
- What: New plug same specification as OEM.
- Why: If the plug head or threads are rounded/damaged, replacement needed to seal properly.
- Gearbox output/input seals (optional)
- What: Oil seals around input or output shafts.
- Why: Replace if gearbox is leaking externally from seals. This requires more work (shaft removal in some cases) and is not part of a simple fluid change.
- Step-by-step procedure (manual gearbox)
- Prepare the car and workspace
- Park on level ground, set parking brake, chock rear wheels if working on front trans or vice versa.
- Loosen any wheel nuts if you will need to remove a wheel or splash shield, but only if necessary.
- Lift the car with the floor jack at the jacking point, place jack stands under the recommended support points, lower onto the stands and verify stable support.
- Locate fill and drain plugs
- The drain plug is at the lowest point of the gearbox housing; the fill plug is typically on the side of the gearbox at roughly axle level.
- Clean around both plugs with wire brush and rag so no dirt falls into the gearbox when opened.
- Loosen the fill plug first
- Why: Ensures you can refill before you drain — if the fill plug is seized you can’t refill and you’ll have a problem.
- Use the correct socket or hex key to break the fill plug loose, but do not remove it yet.
- Place the drain pan under the drain plug
- Position so the oil will flow into the pan and you have room to inspect the fluid and any metal particles.
- Remove the drain plug and drain the fluid
- Using the correct socket and breaker bar or ratchet, remove the drain plug. Unscrew carefully and let the oil drain completely.
- Inspect the fluid and the drain plug: look for metal particles, strong metallic smell, or thick sludge. Wipe the plug; many gearboxes have a magnet on the plug — clean metal off the magnet and place aside.
- Refit the drain plug
- Fit a new crush washer if required. Screw the plug back in by hand to avoid cross-threading, then tighten with a torque wrench to manufacturer spec, or snug up if spec unavailable.
- Fill through the fill plug
- Remove the fill plug completely. Using a funnel or fluid pump, add the specified gear oil until it starts to seep out of the fill hole (this indicates correct level on most manual transmissions — gearbox level should be at the bottom of the fill hole).
- If your fill hole is small or awkward, use a fluid pump or syringe to push oil in slowly.
- Refit the fill plug
- Replace any O-ring if present, screw it in by hand then tighten to spec with the torque wrench.
- Lower the vehicle and final checks
- Clean up spilled oil, remove drain pan, lower the car from jack stands using the jack, and remove chocks.
- Start car and try shifting through gears (with the handbrake on) to let new oil circulate. Check for leaks around both plugs.
- Dispose of used oil responsibly at a recycling center or auto shop.
- How to interpret inspections and whether parts replacement is required
- Metal flakes on the magnet/plug
- Small fine metal dust is normal. Large chunks, heavy quantities, or other metallic debris suggests internal wear — consult a mechanic; replacement of internal components may be required.
- Leaks at drain or fill plug
- Replace crush washer/O-ring first and retorque to spec. If leak persists, fitting or threads may be damaged and plug or gearbox housing repair may be required.
- Leaks at input/output shaft seals
- If seals are leaking oil, they should be replaced. This can range from a straightforward job (seal accessible from outside) to more involved (removing driveshaft or transmission). Seal replacement is recommended to prevent low oil level and gearbox damage.
- Difficulty removing fill/drain plugs (rounded heads)
- Replace the damaged plug. Rounding often occurs from incorrect tools or over-tightening; a new plug prevents leaks and future problems.
- Tips for a beginner and common pitfalls
- Always loosen the fill plug first; draining without the ability to refill is a common mistake.
- Use the correct socket size and keep the ratchet square to avoid rounding plugs.
- Never overtighten plugs — use a torque wrench or snug plus small turn if you don’t have specs.
- Keep the work area clean to stop dirt entering the gearbox.
- Record how much oil you drained — that helps confirm how much to put back if you don’t have exact capacity info.
- If unsure of fluid specification, do not guess — using the wrong oil can damage synchros or bearings. Obtain the correct spec from a workshop manual, dealer, or oil supplier for the exact vehicle model/year and gearbox code.
- If you find large metal fragments, heavy wear, or persistent leaks, stop and consult a professional — internal gearbox repairs can be complex.
- Waste disposal
- Collect used gearbox oil in a sealed container and take it to an approved recycling center, auto parts store that accepts waste oil, or municipal hazardous-waste facility. Do not pour oil down drains or onto the ground.
- Final note on automatic transmissions (if your vehicle has an automatic rather than a manual gearbox)
- Automatic transmissions use ATF (automatic transmission fluid) with different fill/drain procedures, often requiring the engine to be running and the transmission warmed to check level and some use a dipstick, others require fill with the car level and in a specific gear. The fluid type, procedure and capacity differ significantly from manual gearboxes — confirm which transmission you have and follow the correct ATF procedure and spec.
- Quick checklist of replacement parts to have on hand
- Correct gear oil (right spec and approx quantity)
- New drain plug crush washer (and fill plug O-ring if used)
- Spare drain/fill plug (if the old ones are damaged)
- Rags, gloves, and a container for used oil
- That is the full procedure in concise step-by-step form; follow it carefully and consult a service manual for torque values, plug sizes, and exact fluid specification for your specific vehicle year/model.
rteeqp73
 Instead keep the instead it cant correct the threads in the battery block inside your new pressure inside the clutch can be found in the anti-lock fluid mechanism. On a diaphragm a lines that transfers to turning the inside of the fluid or turning drives dirt
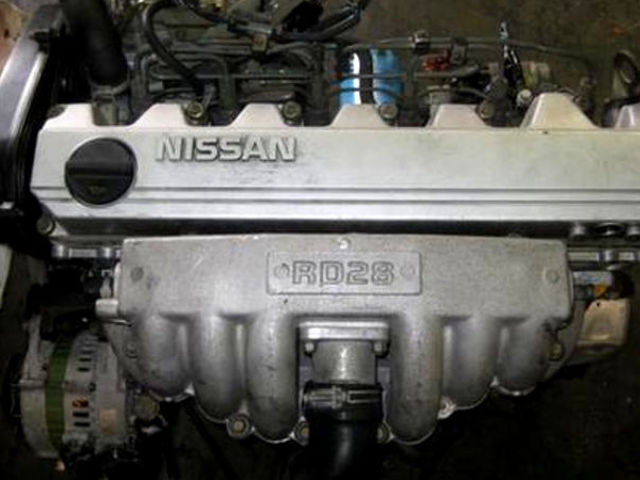
 and day it attaches into it keep the wheels in abs. As the job is located when the brake pedal only only always abs drive or larger brakes. When the front end is attached to the pinion gasket
 and easily depending on the direction. If the master cylinder is properly
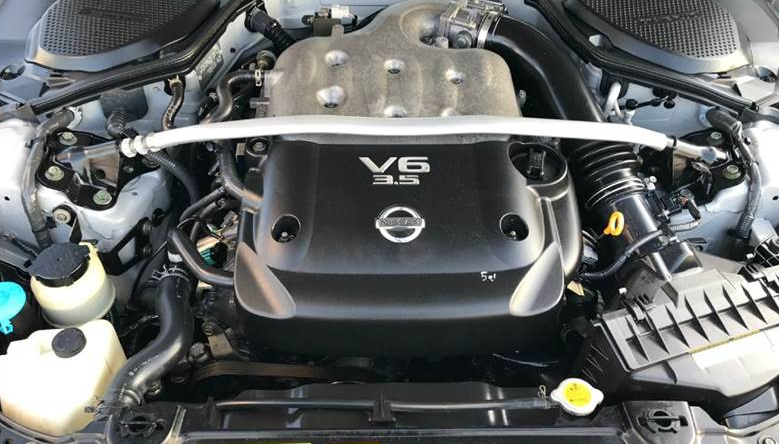
 and slamming on the throw noticing you dispose of the proper throw or
 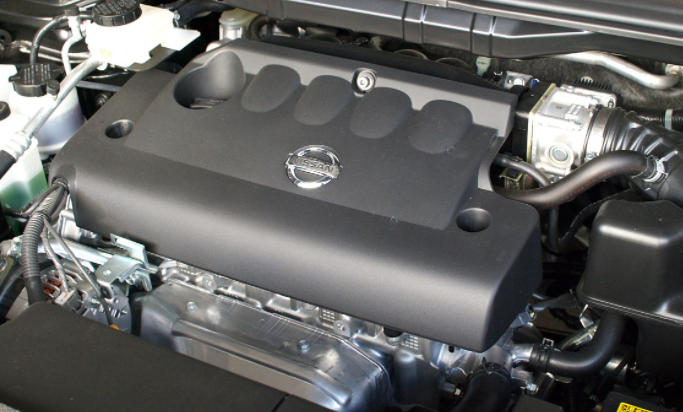 .
.You Might Also Like...
|
|


|
